Ladder Logic for Arduino.
In this article the way how to run program in ladder logic from LDmicro on Arduino is presented. LDmicro is free SW to write and simulate ladder logic programs. When is ladder logic program is successfully simulated it could be compiled for AVR or PIC processor. However ATmega used in Arduino is not supported. Fortunately LDmicro can “compile” code into ANSI C. So, let’s take a look how we can run this code on Arduino.
Little Background
When we select ANSI C Code as Microcontroler type in Settings menu of LDmicro after compile we will get C file. This file contains all logic but it requires header file ladder.h which is missing. So, we have to implement this file. Let say we have input contact called “button” then we have to implement function:
BOOL Read_U_b_Xbutton(void) {
 return digitalRead(10); // button on digital pin 10
}
And similar to others input and output pins. Actually we have to write the layer between leader logic program and real HW of Arduino. And it could be more than simple call of digitalRead or digitalWrite. For example we could control servos, read data from proximity sensor and so on. Ability to write this layer is very powerful. Ladder logic could be used for core logic of application and C only for HW layer.
For more information read actual generated C file. It contains more information.
Generating ladder.h
If we need just direct control of digital IO pins of Arduino ladder.h could be easily generated for us. I wrote PHP script that can do this job. It requires generated code and mapping between variable name we use in ladder logic and pin numbers of Arduino. It will generate ladder.h with all nessesary functions and setup function (correctly calls pinMode for all used digital pin). Script could be used as console application or it’s also available online.
Step by step
Let’s do it step by step. Complete example is available for download.
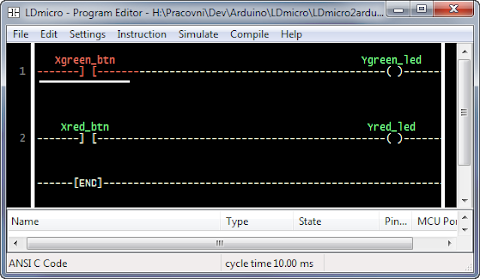
1. Write code in LDmicro.
2. Select as Microcontroller “ANSI C Code”.
3. Compile it as ladder.cpp (save it as *.cpp file not *.c, otherwise Arduino won’t compile it)
4. Prepare mapping for IO pins of Arduino. Its text file called pinmap.ini. See example for details.
5. Generate ladder.h file by ladder-gen.php.
d0” for arduino digital pin 0, “d1” for pin 1 and so on.
6. Create Arduino sketch.
#include "ladder.h"

void setup() {
    PlcSetup();
}

void loop() {
    PlcCycle();
    delay(10);
}
See example for better sketch implementation (this one is for illustration and it's not accurate for timers).
7. Compile it by Arduino editor and upload it.
8. That’s all.
Conclusion
I hope presented method will help you start with ladder logic for Arduino. If you have any suggestion or find a bug in script, let me know.